Custom Search

Tuesday, June 29, 2010

Valis' Short Sleeve Shrug

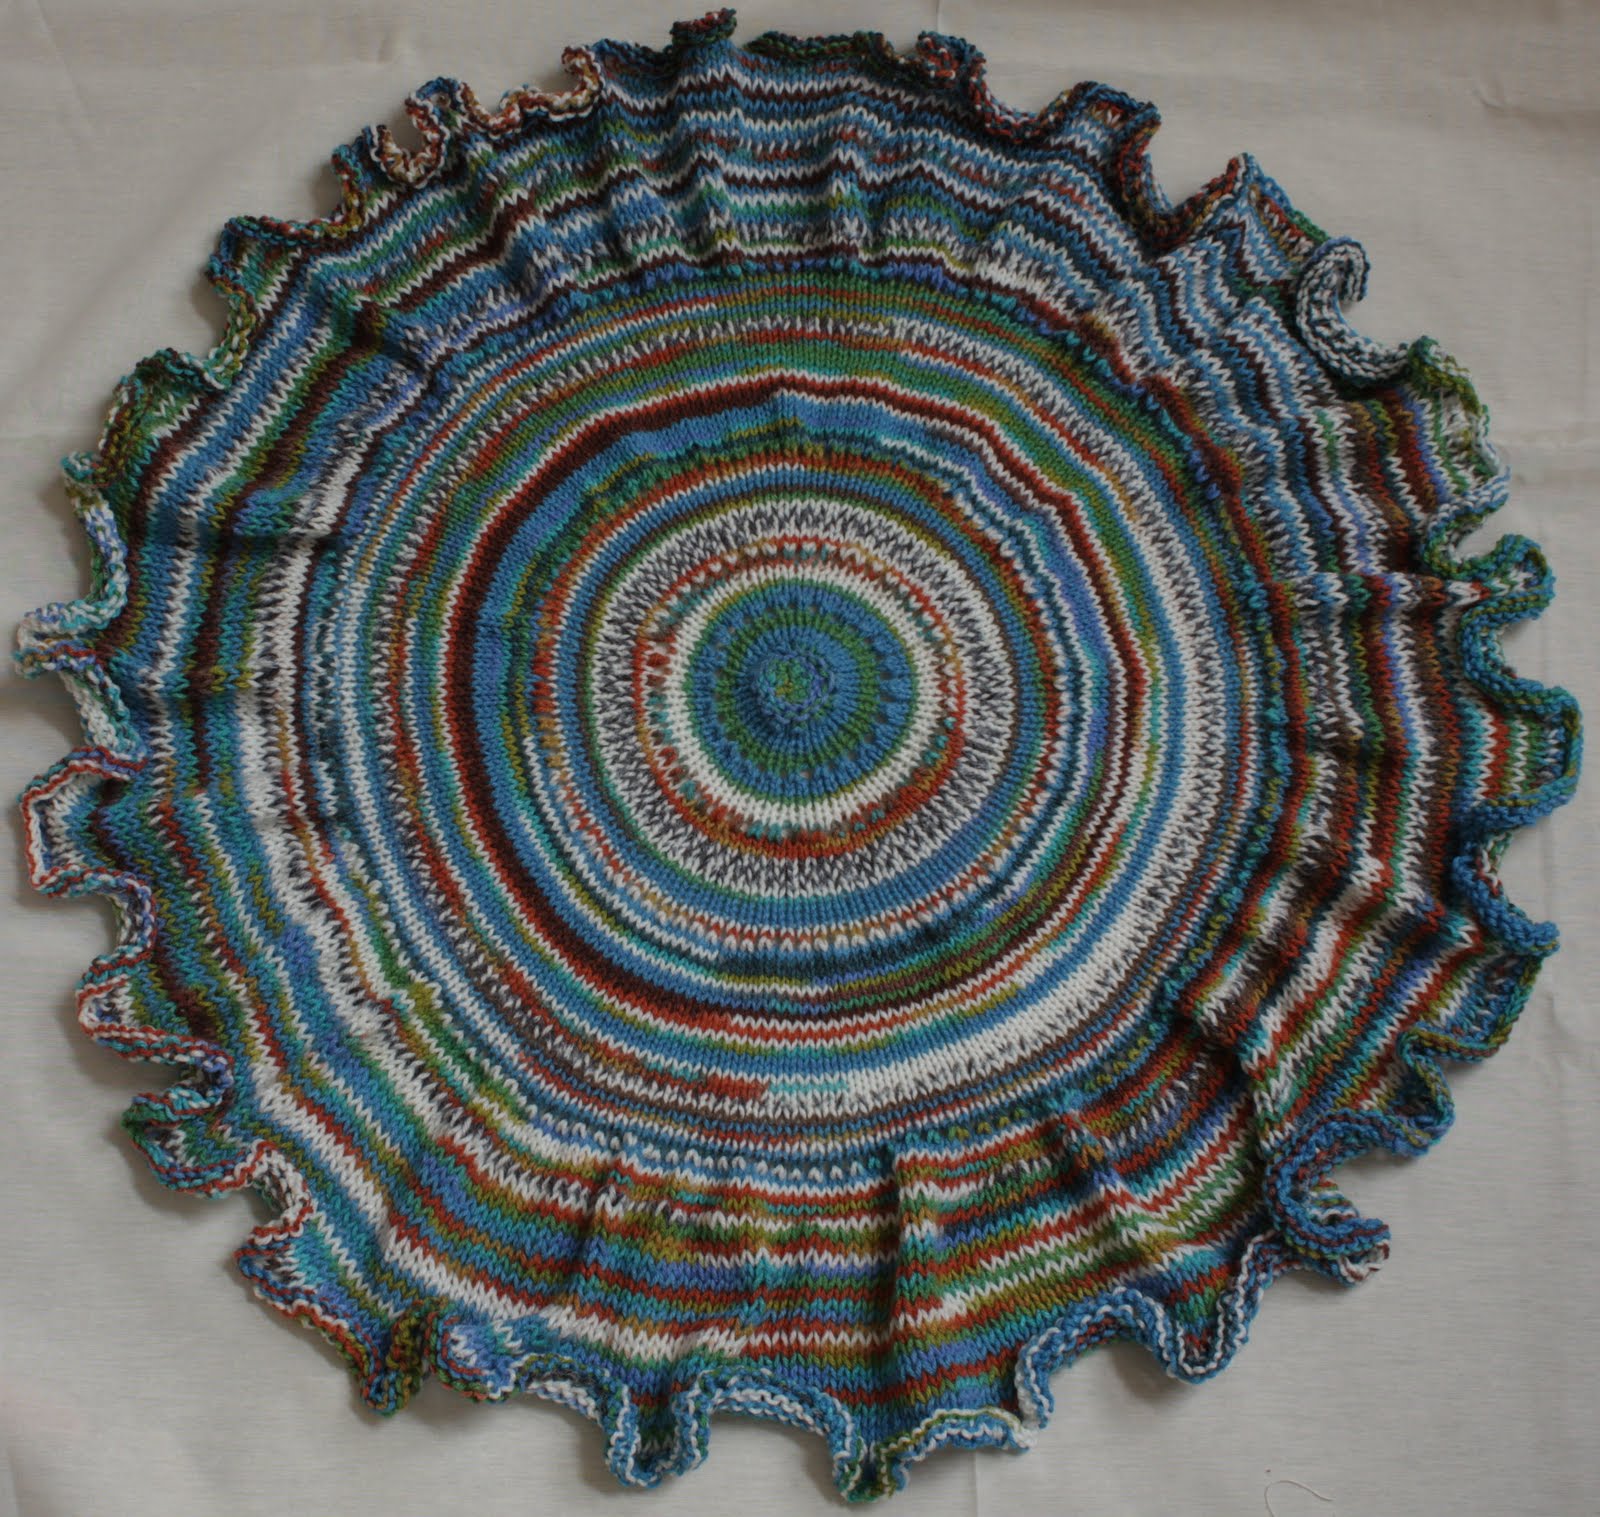
Decided to share a new free pattern. Progress photos to come soon. I added a few knitting how to videos from YouTube. Enjoy!
The Plan:
1. Size 8/24 inch circular needles to work project back and forth.
2. 4 Stitch markers.
3. Worsted weight yarn. For this project,1 Skein-Total of 250-350 yds.
4. Darning needle.
5. Scissors.
6. Measurements: Worked in Garter Stitch.
7. Gauge: 18 stitches (sts) per 4 inches.
(For example, I am 32 inches measured from elbow to elbow across.
I am a plus size and I am doing a short sleeve shrug as a prototype.)
8. Gauge: 24 rows per 4 inches.
(For example, I measures 15 inches from the back of the neck to the hip.)
____________inches Total Across: Elbow to Elbow

1/4 ___sts Arm      1/2___sts Neck   1/4___sts Arm      
___________________________________________
                                                                                              ____inches Down from Back of Neck to Hip
                                                                                              ____Total Rows to knit.
___________________________________________
 Pink shaded area is the rectangled shrug
 9. Cast on your  ___ sts.
(My cast on is 144 sts. The arms are 32 sts for each arm and 72 sts for neck.) 

The Pattern:
1. Garter stitch the first 1/4 total sts and place marker (pm), then knit (k)  1/2 total sts, pm; k the last 1/4 sts. Leave the markers there.
(For me, total of 144 sts=k36, pm, k72, pm, k36.)


2. The total amount of rows = the measurement from the back of the neck to the hip. Check your gauge on your swatch or you skein label to determine your rows.
(For me, the measurement is 15 inches. My gauge in a 4X4 swatch is 18sts X 24 rows.  (6 rows per inch X 15 inches =90 rows.)
3. Once you completed to the final row, bind off. Use scissors to cut off a very long piece of yarn. Place the second set of markers as in step 1 so as to keep the markers in place to sew with the darning needle the 2 arm placements.
4. Sew the 2 arm placements together.
5. Try on your new shrug.
6. Try any stitch you want to use. Add a ruffle, or add fringe.  Be creative.


Remember, you make knitting magic! Valis :)


Monday, June 21, 2010

Valis' Elongated Stitch

Hey everyone,
Since sharing  the new Triangle Shawl, there have been questions of a stitch I used my pattern. So, I made a how to video and it is now on youtube under Valis' Elongated Stitch . There are a few comments to assist you, too. If you are on Ravelry, this may help you.
I have a couple of photos while I worked on this project, maybe it may help you. 2 are during the making of the shawl and the 3rd is from  a close up of the finished shawl. Hope this helps, Valis

Wednesday, June 16, 2010

Valis' Triangle Shawl
This is my first pattern. Triangle shawl in garter stitch with rouching ruffle.
It has alternate ideas especially for a beginning knitter. The ruffle drapes nicely.

The photos show how the shawl collars nicely.
You can see the front and back view.


Valis' Triangle Shawl


Materials:
  • Worsted weight yarn-I Love this Yarn Stripes (Sugarplum) 1 skein= 250 yds. Total of 2 skeins/500 yds. 
  • 1-10.5/24 inch- 29 inch circular needle which yields 7 stitches/12 rows in 2 inch swatch.
  • Stitching back and forth to hold all stitches.
  • 1 tapestry needle to weave any ends.
  • 1 pr of scissors

Measurements:
  • From point to width: 30 inches each side.
  • Wide base: 36 inches.
  • Ruffle rouching is 2 inches thick.
  • Final ruffle is 47 inches wide.

The Pattern:
Starting at the point:
  • Cast on 1 stitch. Knit this stitch and turn. (1)
  • Knit one in front and back and turn. (k1f/b) (2)
  • Knit first stitch in the front and back and knit to the end and turn. (3)
  • Knit first stitch in the front and back and knit to the end and turn and continue until there are 135 stitches.
Begin the ruffle:
  • Knit one and yo to the end and turn. (270)
  • Knit the next row and turn. (270)
  • Knit 1 stitch and knit again in the same stitch which elongates the stitch (not a k1f/b). 
  • Refer to video on youtube.Turn.(270)
  • Repeat 3 rows like this.
  • (If too confusing, you may  use the drop stitch method)
  • Or just knit the next 4-6 rows to make a 2 inch ( or wider) ruffle
Bind off instruction: 
  • Knit one stitch, then knit the next 2 stitches together  which becomes one stitch. 
  • Now, knit the first and knit 2 together stitch you just did. 
  • Continue this bind off to the end. 
  • Basically, it is a knit 2 together bind off.
  • (If too confusing, just do a simple bind off of your choice :)

Let this pattern be a journey and use your own stitches. It's all fun to make.
Happy knitting, Valis

Tuesday, June 15, 2010

Finished Lacy Square Afghan...


I tried a different  final edging using single crochet and triple crochet throughout the edge and gave the afghan a textured ending.


This is the final triangle shawl and started working on the edge. I wanted to do a picot but decided with increasing at the base using my own long stitch versus a dropped stitch due to my awkward left-handedness.


Here are 2 images of the start of the increase at the base.


So right now I am home. I should be done with this shawl tonite. We'll see.;) Valis

Friday, June 11, 2010

Lacy Square Afghan Project

Hey everyone,
Since reorganizing the knitting room, I found an old favorite crochet pattern I would like to share with you. The pictures are the progression of the project from the last couple of days. It's called Lacy Square Afghan which is another Lyn's Designs under Baby Patterns. I had some Bernat BabyJacquard prints and solids available from my stash to finally use up. This is another free pattern that I have used in the past for charity. Tell me what you think. Valis :)

Tuesday, June 8, 2010

Completing older projects and room...

Completing older projects and cleaning my knitting room today. That was a lot of work. I was able to take some pics and wanted to share a bit with you. Now I am not the fancy type but  boy does it looks ten times better than before. Trust me, I am sparing you the before photos.


This is my favorite working table that has been cleared off. Oh yeah, sure.


This is swatch corner.


This is from a real cool book I checked out at the library almost a year ago and just recently ordered from Amazon for a terrific price. it's called For the Love of Knitting: A Celebration of the Knitter's Art. The pictures presented in this book are amazing along with historical stories from renown knitting icons, such as Elizabeth Zimmerman  seen in the top left collage frame. The lower right individual picture are two delicately knitted tea cups and saucers. Just had to put that on the wall.


I guess when my husband and I lost everything from hurricane Ike, it was hard to start over. It is almost a year that we are now in Austin. Actually, it was  my husband  who was the one who encouraged me to put something on the wall  when we first moved here; we were very broke until my first paycheck came through. He took me to the library and as an artist, showed me this book. I took it home and it was like something really magical came back to me. That's why I have them up and when I am down  I can see them and remember there is always hope.
When I had some extra money, I found an opportunity to buy this book. I am very grateful.
Until the next time, Valis

Friday, June 4, 2010

Just wanted everyone to check out the video bar where you can view knit and crochet videos right in this blog. Cool, huh?

Take a moment to try it out. It's free, too:) Valis

VIDEO BAR


Thursday, June 3, 2010

Triangle Shawl Design

Hey, everyone! Been pretty busy, lately. Feeling better-almost like someone turned the lights back on. Finally went back to work.
Off today and started a new triangle shawl with a new edging I worked on yesterday. My husband was tired of me using phone pics and just bought me a new camera. So, all the photos here are from part phone and the new camera. I feel really good because he says he believes in me. That is so awesome. I'm just having a great time just trying to do something different  and outside of my comfort zone in attempting to make new items not only for myself but also to share with you.
This is not from center down but at the bottom point. You can make make your standard center down and try making it the size you want, either a kerchief or a shawl-then pick up stitches around and add your favorite  edging. This is great for a prayer or comfort shawl. I love self-striping yarn and I love the way it makes it own personality.
So, enjoy the pics and tell me what you think. With regards, Valis :)