Custom Search

Wednesday, October 26, 2011


Hi everyone!
Yep, it has been a while but now I have final news to share with you. 
As of today, Valis' Crochet and Valis' Knitting Moment Blogs will
now be PJ Crafts in Austin. My avatar, Valis now ceases to exist.


I am now PJ Crafts in Austin in and I am PJ.
This was a hard decision due to making a go at a business and under my
own company name.
I will add the connection to the new blog pjcraftsinaustin@blogspot.com 
as reference to former free patterns and also, considering the change at
Ravelry and Knitpicks.


The new blog  features not only my new patterns, but other avenues of my 
designs in upcycling, felting, and even sculpting.


My website in under construction and will be out soon. Yep, that takes time.


In the meantime, thanks you all for your support and encouragement in the last 
few years.
Formerly,
Valis, now PJ


For any inquiries or questions, please contact me at pjcraftsinaustin@gmail.com.

Wednesday, September 21, 2011

New Pattern for Alien Chick

Hey everyone!
Yep, I'm back. Been gone for medical reasons and doing better. Also, lost 41 lbs and feeling way better!
So, what's up? Well, there is a new pattern now titled as Alien Chick.
Pattern will up on Friday.
Here's a sneak peak of what she looks like,,,,,,


Tuesday, April 5, 2011

Hair inserts.Part 4.

Welcome to the hair tutorial, Part 4.
This time we will just do photos with simple notes.
Take your time and please send those photos to share on our Little Pigtail Girl CAL  group on Ravelry.
Using Lionbrand Homespun for hair. Wrap around book  or magazine for as much of the hair you want on the doll.


Cut one side  for this yarn , that is her long length for the pigtails. You decide your length if no pigtails;)

I add a thick contrast yarn and map out the hair line around the head.

I use at least 2 strands of yarn at a time which covers and gives a great hair line with a hook.

I pull through the loop slowly, so as not to fray the yarn. Take your time and enjoy this part.


The hair is now pulled throught the loop and you can see the length take shape.


I usually start with the back then work around to the front and finally,  around to the back. With this thickness, you may not have to fill the whole head as I did here. With regular yarn, I use 3 strands and work around. We'll review later.


Her majesty sweetly waiting for her hair to be completed.


She has stated that she wants to look like the poster girl but without bangs.  I tied her hair up with yarn like a ponytail.


 I separated the hair and made sure there are no gaps around the hair line and tied with yarn and added ribbon. She gets a trim at this time or shape the bangs here. You may embellish with ribbon or gems as you go at this point.


This is how she looks and is very happy as you can see. She will be going on her trip to San Antonio, Tx soon with her new family. What a lucky girl!


Thanks for sharing this CAL with us. We will be making  more  dolls with different types of hair , outfits and giveaways. Send us your photos on Ravelry.  Stay tuned.


Sunday, April 3, 2011

Part 3 Adding the the body and arms.


Welcome back to the Little Pigtail CAL.
After adding the shoes and build up to the connection of the legs, the picture tutorials will help in  showing the
body process.


Photo A. 5 rows of 24 sts make the trunk.


The first picture shows how the 2 legs are completed and connected.
  • 1. There is a total of 24 stitches per row. 
  • 2. From the Part 2 24 sts were already created when the 2 legs were connected.
  • 3. Go ahead and work a total of 5 rows each having 24 sts. See photo A.

Photo B. Dec to 18 inc on this row.

The second picture show that the 5 rows are completed.
Now to begin decreasing up to the chest.
  • 1. After the 5 rows done, *1sc in the next st and dec in the next st* repeat 5 times around.. [18]
  • Refer to Photo B.

The next row will be the building of the chest.
  • For the next 3 rows, sc in the 18 scs.
  • Refer to Photo C.


Photo C. Adding the next 3 rows of 18sts.


Now, this is something I do in order to work the rest of this area a little easier.
    
  • From the yellow marker to the tan marker
  • 1 sc to the next 4 sc  and that becomes the beginning stitch.
  • Refer to Photo D.


Photo D. Making a new beginning st.


Photo E. Making the hand.
  Let's stop with the body for a bit and work on the hands and arms.
1. Ch 2.

2. Add 4 sc in the 2nd ch. [4]

3. *2 sc (inc) in the next 1 sc* and repeat in the next 3 sc. [8]

4.Sc in the next 3 sc and * 1 triple crochet (tc) in the 4th sc (to make a thumb) and 1sc in the last 4 scs. [8]
* this optional if you feel like just keeping the tc out.


Photo F. View of the making of the hands in the round.
  5. Dec in the first st and 1 sc in the next 4 st and dec in the last 2 st. [6]

6.  1 sc in the next 6 st  for 5 rows [6]

7. Refer to Photo F and G.

8. This is one way to make the hand and arms.

9.  For those who have arthriris and love to crochet in less pain, I will cover another simpler way to make them. 
Photo G. Looking at how the hand and arms look like to the body.


Photo H. Adding the dress for the chest.
  Let's finish the chest by adding our colored yarn for the top. (The colored yarn will be added to the arms  later by the 2nd technique below.)

1. Starting with your different colored yarn for the dress, 1 sc in the next 18 st. [18]

2. Work  4 more rows, [18]

3. I am using a DK yarn and it looks way smaller but use what you have and add your total of 5 rows. I like the petite charm.


Photo I. Adding the 3 rows of dress yarn.


Photo J. Making the hand back and forth vs. in the round.


This is the arm done differently.
1. Ch 5 and turn.
2. 1 sc in the next 4 ch. Ch1 and turn. [4].
3. *2 sc (inc) in the next sc* and repeat in the next 3 sc.Ch1 and turn.  [8]
4. 1 sc in the next 3 st, tc in the 4th st, and 1 sc the last 4 sc. Ch 1 and turn. [8]
5. Dec in the 1st sc, 1 sc in the next 4 sts, dec in the last 2 sc. Ch1 and turn. [6]
6. 1 sc in the next 6 st for 5 rows [6]
7. Adding the new colored dress yarn,
1 sc in the next 6 sts for a total of 3 rows.
8. Refer to Photo J. Do the same for in the round arm and hand.


Photo K. 2 different arms. On the doll was worked in the round. The unattached done open and sewn to the side.


Photo L. Arms added to the body.
Now the arms are attached to the body. Yippee.
Keep going.....Because now you need to add the head to the body.
Refer to Photos L and M.


Photo M. Head attached to the body. Isn't she cute?


Photo N. Picking up 18 sts around the chest to add the skirt.

Once the doll is in one form, we need to add the dress.
Now you may make the dress separate and attach or you may just pick up stitches from the chest and
circle around and keep adding  all away until you get to size of the skirt size you want. I have done it both ways.
First, let's add it as the photos were shot.
1. I picked up 18 stitsches around.
2. 2 sc in ech of the 18 sts [36]
3. 1 double crochet in the next 36 sc around.
4. Try to continue #3. for 4-5 rows.
5. My last row was just a simple decorative border of shells every other st. You may use your own.


Photo O. Our adorable doll with her skirt finally added.


All she needs is her wavy curly hair.


Please enjoy this session. You may embellish as much as you like. This is your project. Looking forward to seeing your work. Happy Crocheting! Valis

Wednesday, March 30, 2011

Next Step


 Ready for the next Round? Here it is...


What the face and ears should look like.


Plan:
    
  • To add a smile to the face.
  • To make the ears and sew on symmetrically.
  • To work from the bottom up to connect the 2 legs.


Part 2 A: The face and add ears.
 
Face: Embroider the mouth with a simple stitich across.
Smile made.


Ears: Make 2 and use skin tone yarn.
  • 1. Ch 2. 6 sc in the 2nd ch. Sl st to beginning st and bind off. [6]
  • Pin the 2 ears to each side of the head. 
  • Sew the ears on.
Ears made and pinned to head to make sure they are symmetrical.


Ears sewn on.


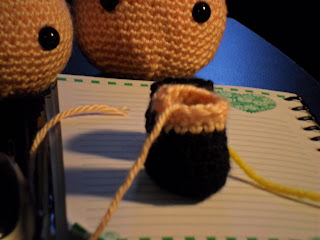
Part 2 B:  Shoes and legs.


Shoes: Make 2 in black yarn. 


  • 1. Ch 2.  6 sc in the 2nd ch. [6]
  • 2. 2 sc in all 6 sc. (inc) [12]
  • 3. 1 sc in the next st, 2 sc in the next sc*, repeat 5 more times. [18]
  • 4. Place marker (pm),1 sc in the next 18 sc. [18]
  • 5. 1 sc in the next 18 sc. [18]
  • 6. 1 sc in the next sc, dec in the next sc*, repeat 5 more times. [12]
  • 7. 1 sc in the next 12 sc.  Sl st to beginning st and bind off. [12]
  • 
     
    Shoe made.
    
  • Shoe made.

  
This completes shoes...now let's add the legs. Black yarn is cut enough to weave in later.

Beginning to change colors.


Adding the leg to the shoe.


Adding more  to the leg and stuffing as you go


Legs:
  • Make 2 in flesh tone yarn.
  • Move the marker here for now.
  • The leg will be 12 sc around for 15 rows.
  •  
  •   After the 1st leg is done, cut the tail to about 1 inch to weave in later.
  • 
    15 rows completed.


  • 

  •  
    Keeping the leg stuffed as you crochet up.
    
 
Start of the second leg.


After the 2nd leg is done, do not fasten off.
  • Hold the legs together. 
  • 1 sc in the next 12 sc around of one leg and then continue to crochet the 1 sc in the 2nd leg's
  •  
  • 12 sc around. [24]
 
Once the 2nd leg is completed, start to connect the two legs.


Added a piece of black thread as a marker to show that 12 sc were done on the 1st leg.


Completed the 12 sc on the second leg.


Completed 24 sc around as the beginning of the lower trunk.


This holds the lower part of the torso and we will crochet up to the begiinning of the chest and add the colored yarn for the chest as the top of the dress.
Does this make sense?


I decided to incorporate the dress on the body when I first made them.
For those that are advanced or adventerous may continue all the way up and add a dress
later. I've done that , too.

Remember, this is your project. I just want to share my pattern and let you embellish as you
choose. That's part of the fun.


Monday, March 28, 2011

Little Pigtail Girl CAL

Little Pigtail Girl CAL
I decided to to make this project a Crochet A Long with photos.
See at the end of this session at the bottom of
the updated photos  that shows the process.
Part One: The Head
The hair will be covered later.

Supplies:
Simply Soft from Caron in Light Country Peach 
1- 3.5 mm/E hook
1 piece of different colored string or marker
1 pr of 12mm or even 15mm solid black eyes
(or black embroidery thread and needle to sew on eyes if this
project is made for  a child < 3 yrs of age.
100% Polyfill for stuffing

Gauge:
1- 6 oz./170 gm Caron Simply Soft will make almost 2 dolls.

Plan:
Using Bernat for beginners in case you need any references. Just click on Bernat.
Using single crochet (sc) with combinations of increasing sc (inc)  and decreasing sc (dec)
Inc: 2 sc in one st. Inc made.
Dec: Insert hook in first st, yarn over (yo), draw up a loop, insert hook in the next yo, draw up a loop, yo, pull through 3 loops. Dec made.
 

Quick look as we increase using a marker especially for  Steps 7-17.


Pattern:

Chain (ch) 2.
  • 1. Single crochet (sc) 7 into 2nd chain stitch (st) from the hook .[7]
  •  Project is worked in rounds, make sure to mark the beginning (or end) of each round so you don’t lose your spot.
  • Make sure your tension is tight enough so when you stuff it, no stuffing is sticking out.
    You may use the magic loop (from Crochetme forum) if you want. I personally like the other way.

  •  2. 2 sc in each 7st. . [14] (beginning to increase)
  •  3. (Sc 1, sc 2 in next st)*, now repeat * 6 more times. [21]
  •  4. (Sc 2, sc 2 in next st)*, now repeat * 6 more times. [28]
  •  5. (Sc 3, sc 2 in next st)*, now repeat * 6 more times. [35]
  •  6. (Sc 4, sc 2 in next st)*, now repeat * 6 more times. [42]
  •  Stopping the increasing and now creating the main part of the face.
  •  7-17. Sc 42 sts around for 10 rows. Use your marker or your piece of yarn to designate the first st.
Let's stop for a second...let's plan to place the eyes on this doll.
Now, we can mark with contrast yarn to place the eyes or place the
plastic eyes in the designated area without snapping the back part on (just in case you miss the position like I do sometimes and have to almost rip off...don't do that!)

See the dec st make  7 cool angles  see your eye placements


But by experience, just placing a marker to kind of placing where the eyes may go and think about how far apart you want the eyes to be placed.
Is this this critical? Yeh, it is because with amigurumi, we are looking at cuteness.  Personally, I  go between 6-8 sts apart vs some
designers going closer or further apart. It's your choice.
Some designers favor to start filling the head at this point but I found that you get that fuzz caught on the hook.
My suggestion is to do some decreasing sc rounds and then start to fill as well as look at how the eye placement appears. (This goes for embroidery or even placing black felt pieces and embroidering around the eyes)
  •  18. (Sc 4, decrease (dec) 1)*, repeat 6 more times. [35]
  •  19. (Sc 3, dec 1)*, repeat 6 more times. [28]
  •  20. (Sc 2, dec 1)*, repeat 6 more times. [21]
  •  21. (Sc 1, dec 1)*, repeat 6 more times. [14]
Believe it or not but, you may start placing the eyes  between  Step 20 or 21.

Better shaping and better eye placement.

You can see the decreasing angles and can gauge where the eyes may stay and then fill.
You can feel the shape of the head and be more confident  toward the final shaping.
  •  22. dec 7 [7] and slip stitch (sl) into the last st and pull through the loop to complete the round.
  • 
  • 23. Weave in ends. The torso will have a weaving tail to attach to the head.


Closer look at eye placement.


For now this completes the head. Next part will complete the ears and  add a smile with embroidery thread. We will start on the feet and legs, too. Until then, happy crocheting! Valis

Update for this blog.Photo review of the Head. 
Completed the inc and dec rounds with eye placement.

Eyes needs more adjustment.


Happy with the adjustment and snapped eyes on, then start to fill head.

Completing the dec rounds-Almost done!

Last 6 stitches and ready to close and shape.

Closed and will weave extra yarn inside and shape the head better.

Reshaped head. Does this all make sense? I hope it does.